"There are so many Wows, I don't know where to begin."
Introduction: The long-anticipated release of this 10-level set (yes, you heard me right - 10 maps, including one "super-secret" map if you generate sufficient stats in each preceding map) as an Episode 1 replacement for the original DooM has the DooM community in a feeding frenzy. Supporters, and there are many, vow that this is one of the best mods ever to be produced. Detractors (whose numbers seem to rival those of the supporters) vociferously argue that the final product does not live up to the hype that preceded the release. In the reviews that follow it is not my intention to validate any of these positions. In other words, I consider myself a neutral party - I was neither involved in the development of the project (or was a fan-boy), nor was I engaged in the project- and team-bashing that appeared to be prevalent on the forums. Instead, I quietly waited for its release, knowing that a lot of talent and effort was going into this project. As with any other major release, I understand that expectations are likely to be high, and KDiZD is no exception. Does it live up to the hype? Does it take its place in DooM history as a wad that should find a permanent place in every dedicated Doomer's computer hard drive? Read on and decide for yourself, gentle reader.
A couple of quick notes on how I organized and approached these reviews. I have examined each map from four principal standpoints - Atmosphere & Architecture, Map Design, Gameplay, and the Wow Factor. Most of the criteria for examining these aspects are self-explanatory, but you're probably wondering what the 'Wow Factor' is. Simply put, this includes all the things that I consider new and outside of the realm of mainstream DooM wads and mods, from clever scripting to new enemies. I approached these reviews both as a player and as a map author. I believe this gives me a singular perspective, in that I can experience the game while simultaneously appreciating the cleverness that might have gone into it. I do not expect everyone to agree with everything I say (the whole "One man's meat is another man's ..... etc."), but then I've been around the block enough times to have gotten over it a long time ago. So, without further ado, I give you my 2 cent take on KDiZD.
KDiZD: Relive the Nightmare
This aptly named mod is one that needs to be savored, like a liesurely four-course (or, in this case, a 10-course) meal. Knee Deep in ZDooM combines the best of DooM's Episode One and ZDooM's many wonderful features. Start with the Magic of DooM E1, throw in heaping spoonfuls of talent, stir in a measuring cup brimming with imagination, and ladle in a cupboard-full of hard work, and you get KDiZD. [Also, from what I read in the forums at the launch of this ambitious project, a pinch of modesty would not have hurt either. Heh.] With every mouthful you will delight in the many flavors the Team has served up, whether it be the magnificence of the architectural detail, or the many, many new toys and playmates (wicked, though they seemed to be) available for your gaming pleasure, or the clever way in which new mapping ideas are woven into the fabric of the original E1 maps. And you will leave the table very-well fed, your appetite for DooM properly sated.
In so many ways, the best way to describe this effort is "innovative". There are things you see here that I don't believe have been done with DooM before. The beauty of it is that they are not done simply for the sake of being flashy (although I'm sure there will be some who will argue this point), but to enhance the look and feel of the game and to make the experience more immersive. And this is where I feel the greatest strength of the project lies. Yes, there are more than a dozen new enemies, each better-looking than the next. Indeed the weapons are awesome and fun to use. No doubt the new skies and textures and decorations are superb. But under all that is the fundamental question: Is it fun? To me, the answer is a resounding "Yes!" The mod is a terrific amalgam of DooM and something else - something quite original. Have you ever played a DooM mod in another engine, say Duke 3D or Quake? You know what you're seeing is DooM, but there's just enough different to make it new and exciting. That, in my opinion, is where KDiZD succeeds.
I played a new map each day, partly because of Real Life commitments, partly because I wanted to devote my attention to one map at a time so that my impressions would be fresh in my mind while I wrote the reviews. The scale and magnitude of these maps demand nothing less. I know that when I play them again, without the constraints of having to "observe" the game as a neutral participant, I will play them for the sheer joy of playing a game well made. I will take advantage of all the secrets, knowing that I have fulfilled my duty to play the game without them so that I could report impartially on the game as the authors primarily intended it to be played. [Refer to my individual map reviews for more on not using secrets as much as possible.] I will be forewarned of the strengths of my opponents, and like Sun Tsu, the great Chinese WarMaster of old, I will use that knowledge wisely. But above every thing else, I will play it to get lost again in the wonder of it all.
Were there things that the KDiZD team could have done differently? Sure. At least I think so. But then, opinions are like assholes - everybody's got one. I've been around long enough to know that in all endeavors of this scope there will be some things that some people will not like, and there were a few (emphasis on the word "few") things I did not particularly enjoy. However, this is neither the time nor the place to highlight those instances - where appropriate I've mentioned them as part of each map's review. For now I am content to say that the occasional gripe I had is probably not universally shared, and arises more from my personal preferences and playing style. As the inimitable Abraham Lincoln famously said: "You can please some of the people all of the time, and all of the people some of the time, but you can't please all of the people all of the time."
So, in conclusion, where exactly does KDiZD fit in the annals (Heh, heh. He said anal. Heh, heh.) of DooM? Is it a great reinterpretation of a classic or merely a sophisticated hack? Does it rank up there with the greats (such as Memento Mori and DooM Eternal) or will this be remembered as just another "decent" Episode 1 remake? You tell me. Seriously. Email me at This email address is being protected from spambots. You need JavaScript enabled to view it.. If I get enough responses I will tally the results and update this summary. As for where I stand, I think these reviews speak for themselves.
MapZ1M1: The Hangar
Atmosphere & Architecture: Z1M1, in my opinion is wonderfully atmospheric. From the broken pathways through nukage pools to cracked walls that sporadically emit sparks, the map evokes images of an urban battleground. Add to that areas that are darkened by (presumed) power failure, and you are sure to get a creepy feeling from time to time. There are other touches, such as broken tiles under which a seemingly organic and gelatinous liquid flows, and the ominous and cloudy skies over the hills of Phobos, that lend an air of a forlorn and abandoned military base. I will say, however, that I thought some of the areas were very dark - to the point of adversely influencing gameplay. But more on that later.
The look and structure of the map are very convincing too. Although the "shuttle craft" on which the player arrives on Phobos is somewhat hokey, the rest of the map does not disappoint. Step into the "Hangar" and you see a crate cleverly suspended from an upper level in a manner that ordinarily defies the limits of the DooM engine - it appears to be true 3D instead of the 2.5D with which we associate DooM. Being a map creator myself, I can appreciate the cleverness and effort that goes into creating such illusions. There are some that may insist that the map is unnecessarily detailed, but I will take exception to this position. I felt that the elements of the map's architecture fit very nicely into the overall theme of a futuristic off-world base.
Map Design: To me, this map has most of the elements of important map design - connectivity, a mix of indoor and outdoor areas, areas that are visible but not accessible at first but which one reaches as part of the map's progression, non-linearity (in that the player is required to return to areas previously visited). The map can be slightly confusing at first, but the logic of the map becomes evident after exploring the place a bit. I do not subscribe to the theory that the natural progression of a map should be immediately obvious to the player. [I hasten to add that neither do I recommend making maps so puzzle-heavy that it becomes frustrating, especially for those who play the game for its general simplicity.] As such, I believe in making a map unfold over time, occasionally making the player scratch her/his head, and providing a sense of satisfaction when the player has finally solved a problem. In other words, a balance of action and exploration. In this department Z1M1 delivers.
One of the things I look forward to in any DooM map is the discovery of secrets. In a way, I believe that secrets are a way of seeing if the map's author can outwit the player without making the process too frustrating. Accordingly, I also believe that the discovery of secrets should not be mandatory to the successful completion of a level, either because the secrets are an essential part of the map's logic or provide powerups or other items necessary for progress. The secrets in Z1M1 definitely meet these criteria, and they nearly outwitted me. I did manage to find all three of them, but I needed the hints provided in the various forums. The authors have cleverly disguised the secret areas, but to their credit have provided clues to those who spend the time to seach for them. Using the automap is vital in figuring out how to access them, and the challenge posed does indeed generate a rewarding feeling when the secrets are uncovered.
How does Z1M1 stack up against E1M1? I don't believe this is a fair comparison. E1M1 has its place in the history of first-person shooters, but I do not believe that the Team KDiZD intended (the original hype notwithstanding) to supplant its exalted position in the mind of DooM fans. Instead, this was an attempt to re-interpret a beloved map using more advanced tools than were available in 1993. As such, when I played the map I approached it with a completely open mind, much like I would when I play any other map. And when I did, I did not find the effort deficient. Now some of you may gripe about how this map departs from the original. To me, this makes the map more enjoyable, in that the experience is fresh and different. And yet, there are plenty of areas that immediately hearken back to the original and make the player go: "Aha!" Overall, I consider this map a terrific homage to the original, while standing on its own merits as a worthwhile level.
Gameplay: This aspect of Z1M1 is a mixed bag. There are aspects that make the experience immersive and realistic, engaging the player, and departing from the standard key hunt. These include finding the explosive device to permit further exploration of the map, turning off the radiation to allow access to the exit, and switches with monitor screens that allow the player to see what the switches have activated. On the other hand, the prolonged fights with simply a pistol were tedious. [And yes, I know that the player can acquire a shotgun early if s/he finds the first secret.] Perhaps I'm spoiled by the hundreds of maps where I pick up the shotgun relatively early in the process, and am therefore not stymied by the lack of a resonably powerful weapon. Still, I can't help wondering if this aspect of the map could not have been reconsidered. But enough about that. Let's talk about the ammo-armor-health balance.
Overall, I found the difficulty level to be commensurate with those of most modern maps for DooM, and I consider myself a moderately competent player. Let me point out that I played the map in Skill 3 (Hurt Me Plenty), and for the most part I played cautiously. At the end of the map I found myself flush with ammo, health, and armor. In other words, on average there is plenty of what you need in the map. However, I did find that there were times when I was dangerously low on what I needed (at one point actually being down to 1 health point). I think that the map could have done with a little more ammo and health in the beginning and middle parts of the map, especially as the player is pitted with just a pistol against sometimes difficult to reach enemies that take several bullets to bring down.
Another aspect of gameplay I consider important is replayability. The first time I play a map I am typically very careful, saving the map periodically, and conserving health and ammo. After I understand the logic of the map and the parts that present the greatest challenge, I go back and replay the map more boldly. I believe some of this is what all players ought to do - play a map to understand the progression the author intended, then go back and play it again (either with the intended logic or any alternative the player chooses to explore). One cannot judge a complex map solely on the basis of a single play-through. Having said that, I think that this map deserves to be played a second (and maybe even a third) time.
It looks good and the map design is clever, but is it fun? The answer is: "Mostly, yes." Why 'mostly', you ask. The fun I derived from this map came primarily from exploring it and admiring what the authors had put into making it look and feel the way it does. And yes, once I picked up the shotgun and got enough ammo, it was a blast fest, especially as the enemy placement provided a nice challenge. Still, there were areas that were very dark, making navigation and self-defense somewhat difficult. Having just a pistol for a sizable portion of the map also reduced the enjoyment of the game. Overall, however, I found the map to be very satisfying, particularly in the way it balanced mission objectives with enemy battles.
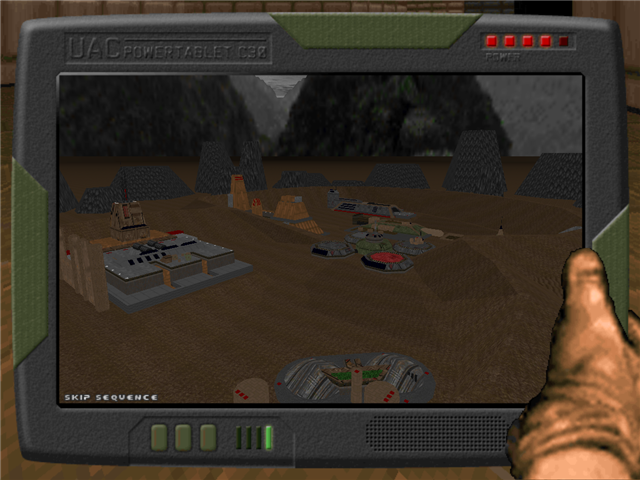
Wow Factor: There are many new textures and things that create a unique feel to the map. ZDooM features are liberally used, but not in a manner that would detract from the overall experience of being in a base that has been overrun by demonic hordes. Lamps and lights have simulated coronas, security cameras abound, and ambient sounds are well used. The map even introduces a worthy new opponent. I'm referring, of course, to the enemy known simply as "The Shadow". This is a imp-reincarnation with red eyes that glow eerily even from across a large room. Very well created, in my opinion. The introduction was cleverly done, fitting in very nicely with DooM's story and generating the perfect mood to begin the game. However, the piece de resistance has to be the data pad on which the player's stats are displayed at the completion of the map. Replacing the traditional E1 intermission screen, the data pad is interactive and takes the original intermission screen several steps into the future. [Unfortunately, the controls on the pad are not intuitive, and the text file provides no instructions for its use. I had to mess around with my keyboard controls a little before I could exit the data pad and move onto the next map.]
[EDIT: I forgot to mention that Z1M1 introduces a new enemy - a faster-firing variant of the standard Zombie Man.]
So how does Z1M1 stack up against the many E1M1 clones? To me, despite its occasional drawbacks, it is a great example of what a creative author can do with the tools at hand. In summary, I would say that Z1M1, while providing a teaser for what to expect in the rest of the game, earns the right to stand on its own as a strong map that deserves to be played again.
MapZ1M2: Nuclear Plant
Atmosphere & Architecture: What can I say? The map has all the elements that made the original E1M2 so unique - reasonably well-lit areas balanced by dark and creepy computer rooms, nukage in abundance but the gorgeous hills of Phobos visible from many areas of the map, claustrophobic interiors and the wide-open spaces of outdoor environments. There is less evidence of the structural damage that was prevalent on Z1M1, and the base seems better preserved. This, in a way, made me forget that the UAC colony on Phobos had suffered a devastating assault. Nevertheless, it did not lessen my enjoyment of the map.
The architecture in some of the map is nothing short of spectacular, and I do not bandy this praise lightly. I'm sure to piss off some people when I say this, and Team KZiZD should not get a swollen head from this comment, but this is what E1M2 would have looked like if JR had created the map today [deja vu, anyone?]. I truly felt at home in the map, and spent long moments admiring the various accents and detailing that went into enhancing the look of the original. The map is unmistakably the Nuclear Plant of E1M2 fame, just more interesting to look at. Little touches (such as the broken conduit in the starting room that is leaking nukage) add a level of realism that make the level that much more enjoyable to play.
Map Design: For a large part the map mirrors the original E1M2, and that's not a bad thing. Building upon a classic is commendable, if the results work. And Z1M2 does not disappoint. Moreover, the authors have cleverly integrated many new areas (some of which the player is required to traverse) that make this map stand on its own merits. Many areas are where you expect them to be, and the initial progression is virtually identical to that in E1M2, but for me it was like taking a stroll with a quirky old friend - the company is collegial and comfortable, yet I knew that I must expect the unexpected. The new areas are well-crafted, and integrate nicely into the overall design of the map.
This map has a staggering 9 secrets. Some secrets are essential for discovering other secrets, and some make the acquisition of other secrets .... how should I put this .... less painful (from a radiation standpoint, if you get my drift). To me, the clue for almost every secret was reasonably evident. As with Z1M1, using the automap is essential for uncovering some secrets, while careful observation of the areas around some of the others is adequate. The only secret area that I never would have discovered on my own (without endless hours of humping every wall) was the one where the green key was hidden. I especially liked the way by which the player needs to access the blue key. Cleverly done.
Gameplay: This level is slow to start off, with just Zombie Men to oppose you at first, and then the going gets better. Much better. I did not begin with a pistol start, as I understand (from reading the forums) that the super-secret Map Z1M10 can only be accessed if the player acquires a certain level of cumulative stats. As such, it seems that the KDiZD team intended the player to continue forward with all weapons and armor collected from the preceding maps, rather than starting each map afresh. I have acquiesced to this requirement, but do intend to go back and play each map with just a pistol start. Regardless, I started the map using just my pistol until I picked up the shotgun (very early in the map, I hasten to add). And then it was time to Lock & Load, Baby!
The gameplay is very DooM-like, and I say that in the best possible way. [Isn't that why most of us continue to play the game, after all?] The player is put into sometimes tough, but fair situations. The occasional trap surprises but does not overwhelm. The creepiness of the darkened computer area brings back the old phobias (sic! It is Phobos we're on, after all.) The odds are sometimes against the player, but the authors give us enough room to maneuver, and even challenge our skills. Kudos to them for that. Still, all-in-all, this was not a difficult map, and right in keeping with the difficulty level one would expect to find in the second map of a modern Episode 1 replacement. I did feel, however, that some areas could have done with more enemies (primarily the secret areas behind the green and blue key doors), that could have teleported in when the player was mid-way to his/her destination.
The balance of ammo, health, and armor tends to lean towards the liberal. I played the map somewhat less cautiously than Z1M1, but at no time did I find myself dangerously low on any of the essential items. [Admittedly I entered the map fully loaded, and perhaps the balance will tilt somewhat when I play it with a pistol start.] Depending on your perspective, a liberal quantity of items can be considered a good thing. Many people play DooM primarily to be able to go into a room, guns blazing. And for that, health, ammo, and armor are commodities that those folks desire in abundance. And for people that want to push the envelope and see how they can get by with the least resources, there's always the pistol start.
I found this map to be very fun to play, not the least because it looked and felt so much like E1M2. Don't get me wrong, I enjoy departures from maps cast in the DooM mold. But to play an original with so many creative twists and so beautiful looking to boot, is sheer delight. To illustrate how much fun I was having, I occasionally would forget to save the game, because I was so immersed in it. While it was relatively easy at HMP skill, it's definitely a map that deserves to be played again, either on UV skill or with a pistol start. So, yes, Z1M2 belongs in your stable of maps to which you intend to periodically return.
Wow Factor: This map is chock full of new stuff, including 4 ..... count 'em ..... 4 new enemies. The first time I saw the Satyr I went: "Whoah! That is so cool!" My surprise and fascination quickly gave way to the strong desire for self-preservation. I had to duck around the corner to switch from a pistol to the shotgun, after which I proceeded to waste the sucker. My only regret is that I did not put the fellow through his paces to find out what pain he is capable of dispensing. The next new opponent I ran up against was the Stone Imp, which was not as much of a surprise (in terms of behavior), as it appears to be a modified enemy from the DooM Monster Resource Wad. Still, it was satisfying to watch the barrels explode around them and take them down. The Mauler and the Soul Harvester were complete surprises. Yes, the Mauler looks like a DooM Demon that's had its ass stuffed with red chillies, but when it first jumped at me I was pleasantly spooked. The Soul Harvester was another enjoyable shock, and watching its "soul" leave its mortal fold when the creature was no more was a wondrous thing. All in all, this was a plethora of goodies, and I want to go back for more.
In summary, this is a worthy tribute to E1M2, not just in the enhancements to the original but also the additions. Aside from the map being somewhat easy to play in HMP skill and starting with full health, armor, and ammo from the previous map, this is a very enjoyable romp through a beloved area of the DooM universe. And hunting down those nine secrets ought to keep the most observant of players quite busy.
MapZ1M3: Toxin Refinery
Atmosphere & Architecture: In what is clearly the tradition of this map-set, the authors have crafted a map with an eye to detail and realism. Given the limitations of the DooM engine and even ZDooM, these guys have built what could (with some imagination) pass off as a nukage processing facility. The texture use and constructs (from vent piping to aeration columns, from agitators to holding ponds) all reinforce the idea that you are in a place where dangerous chemicals are being treated. In many places I was reminded of the base-style areas of Quake, and I say this as a compliment. This map definitely deserves a -nomonsters walkthrough, simply to admire the creativity and effort the authors have put into it. I must add that the caverns and mines looked convincing, with a natural appearance, and the human-constructed appurtances were nicely integrated into the rock.
I haven't touched upon this in my reviews of the earlier maps, but there is wonderful use of ambient sound throughout the maps. From water drips to the hum of machinery, the maps abound with noises that one is likely to hear in installations of that sort. I have worked in my share of industrial facilities (having even visited several nuclear power plants) and some of them have been fairly old, even decrepit. Water is always dripping from pipes and conduits, stuff is often clanking away, pressure relief valves are frequently hissing, sludge is flowing with viscous, gloppy noises. A sense of all of this has been wonderfully captured in this map, to the extent that I am glad the atmosphere is not masked by music.
Map Design: Staying true to the form exhibited in Z1M2, this map faithfully follows the basic layout of E1M3, the original. To its credit, the KDiZD team has altered the logic of the familiar areas, and added new areas (including a vast underground labyrinth and other sections that fit in quite nicely with the Toxin Refinery theme). The main entrance area is a hub of sorts, from which you launch into your quest for keys, switches, and other artifacts. The areas within each of the sections are well connected, and there are multiple routes you can take to achieve your objectives. I want to point out that because of the map layout, you will spend a lot of time exploring and back-tracking, and that's not necessarily a bad thing. However, because of the size of the map, I frequently found myself at a loss to figure out where to go (or what to do) next. The automap was my close ally, but with the denseness of the sectors and the compactness of many areas of the map, it sometimes was difficult going despite the automap.
This map tops Z1M2, in that it has an incredible 11 secrets. As with Z1M2, it is necessary to find some secrets in order to find others. The Team has been very creative in the ways by which the player can access them. In particular, the method used to reach the area with the Soul Sphere was innovative and clever. There were many secrets that had me scratching my head, in particular the one with the berserk pack near the secret exit. Without giving too much away, I can say that I am thankful I had found the rocket launcher in another secret area. Still, it was not an easy way to get in. Finding a way into the secret area with the green key (and our good buddy Duke Nukem in a barrel) was another puzzler, but very nicely done. And finally, I found the Terrorsphere, but only after I didn't need it any more. It is cleverly hidden from view unless the player is looking around, or is exiting the area in which it was intended to be used. Ah, well. My fault for not being more observant.
[EDIT: The berserk pack near the secret exit can be reached with some crate-hopping and a fair degree of patience and skill. My thanks to the readers at the DooM World forums for pointing that out.]
Gameplay: All I can say is Whew! I'm exhausted after spending more than 4 hours in the map, mostly to figure out every last doggone secret. I enjoy large maps (having created several monster maps myself), but I must say that this map came this close to pushing me over the edge. [By that I mean I was sorely tempted to switch to the cheat code of my choice and finish the map in any way that I could.] It was only my determination to complete the map in the manner intended, so that I could do a fair and complete review, that kept me going. To many, this map will be very frustrating, not least because of the number of objectives. It is a daunting task, despite the help (in the form of arrows and colored lines representing the various keyed doors) provided in the automap.
The fights were often exciting and sometimes pitted me against tough opponents in close quarters. Notable examples are when some of the keys are picked up, the most tense of them being the key (I won't spoil it for the reader who has not played the game by revealing the color) that results in the lights going down before turning red and oscillating, and releasing some very pissed-off satyrs. The final fight at the secret exit was a nail-biter too. Don't get me wrong. There's plenty of cannon-fodder in this map. But the gems are to be found selectively, as well they should.
There is no shortage of ammo, health, and armor. As with Z1M2 I entered the map fully loaded, and that probably made my job a little easier. However, I used only the pistol until I got the shotgun (which was almost right away), and only the shotgun until I picked up the chaingun, and only those until I got the chainsaw. I never used the rocket launcher against enemies, as this weapon is only found in a secret area. In fact, I only used the RL once, which was in an attempt to access the last secret. I used the chainsaw a lot (which is what I tend to do in DooM) and was thus able to conserve ammo, but even otherwise it appears that the "kick-the-damn-door-down-and-waste-everything-in-sight" crowd will not face a dearth of items. There are plenty of backpacks, enough health, and lots of armor (admittedly some of the good stuff like beserk packs and blue armor is in secret areas) so that the player that wishes to cruise through can do so. The complexity of the map notwithstanding, of course.
This map was a mixed bag in the fun-to-play department. Yes, many of the fights and the new enemies (more on that later) were exciting, but the endless searching to complete mission objectives in a vast space became occasionally tedious. I'm not sure if the scripting could have been enhanced to make each succeeding step clearer to the player, and this might have made the progression a little less confusing for me. [Perhaps when I have the opportunity I will look through the scripts, but right now I feel like I need two aspirin and then I want to delete DooM from my computer. Heh!] But all kidding aside, this is an enjoyable map in many parts, and I would like to go back and play it again. Just not yet.
Wow Factor: Once again the Team has demonstrated its talent and effort. I counted four new enemies, from the weaker ones (such as the chainsaw zombie and chaingunner) to the faster, tougher version of the standard Demon (Blood Demon) to the tough ones (the Manticore-like Hell Warrior). Each enemy has been painstakingly crafted to look and work like the DooM (and in one case, Hexen) enemies on which many of them have been based, with new behavior that distinguishes them from their predecessors. Aside from the new enemies, one of the things that made me go "Wow!" was the intricacy of some of the scripting that I knew must have gone into the map. The method of reaching the Soul Sphere alone deserves a round of applause.
To round off this review I will say that this is a map that some will find marvellously complex and enjoyable to explore, while others will likely lose patience with. For my part I stuck with it, occasionally feeling like I was slogging through the map, but enjoying the many surprise fights and wonderful detail. From personal experience with building enormous maps I can empathize with the authors of Z1M3, and I know how much work must have gone into it. I laud them on their effort, but still have mixed feelings about this one.
MapZ1M9: Military Base
Atmosphere & Architecture: From the brooding skies to the forlorn hills to the occasional raindrop, this map has an ominous, sullen feel to it. The overhang of dark clouds creates a distinct feel to this map when compared with the previous ones. Touches like the green tint to the air in the area with the nukage channel (at the far end of the area behind the blue-key door) add an element of realism to the map. In fact, I was hesitant to enter the area at first, believing I would lose health from the radiation. Some areas (such as the one with the rocket launcher) were creepy and claustrophobic, while other areas (such as the open area near the exit building) were almost inviting. A very good contrast. I haven't mentioned this in earlier maps (not because it didn't apply, but because there was so much else to cover) but this map as well as the others have used lighting to very good effect.
As with the other maps I've played in this set, the architecture is top-notch. There were some areas where my jaw actually dropped (most notably the area with the Rifle), and I spent long moments just admiring the creativity and imagination of the authors. The outdoor area in the direction of the exit was not too shabby either. I should have mentioned this for my review of Z1M3, but the team has done an excellent job with the outdoor areas. The hills are very natural looking, with appropriate use of texturing. Using triangular sectors smooths the slopes and prevents the appearance of ridges that detract from the look. [This approach is undoubtedly modeled after the terrain-generator that Grubber (aka Jan Cholasta) had developed a couple of years ago.] All in all there is plenty of eye candy to be had in Z1M9.
Map Design: It increasingly appears that the maps in KDiZD are modeled around the core areas of the original Episode 1, with vast additional areas. [Z1M1 has been the only departure from this trend so far (in that the original areas are not quite so distinctly rendered), with the other maps replicating the core areas in scale and relative position in the map.] Now that's not a bad thing at all. I personally love the look of the familiar E1 areas with all the changes the ZDiZD team has introduced. This map delivers the "upgrades" in spades, while retaining much of the original logic of E1M9. The great thing is that the new areas could easily have been a part of the original, with the progression remaining the same - in other words, a lot of connectivity, and a lot of straightforward key searches.
This map has just 3 secrets, and after what I went through on Z1M3 to find every last secret, I am very grateful. One of the secrets mirrors the one in the original E1M9, and the other two are brand new. One of them yields a powerful new addition to your arsenal (more on that in the Wow Factor), but it requires a vigilant eye and thorough exploration. It's almost right in front of your eyes, but hidden from view, so using the automap or even the computer map (via a cheat code) will not help. Very nicely done. The last secret takes a little bit of jumping at the proper angle, but it's not inordinately difficult to acquire. Also, a bit of a correction to my discussion on Z1M3 secrets. I found out that the area with the berserk pack near the secret exit can be reached with regular crate-hopping. No rocket-jumping is necessary, and I even managed to make the necessary jumps. [Many thanks to the reader of the DooM World forums for setting me straight on this.]
Gameplay: In keeping with the other maps in this set, there is a lot of the style of play that is very DooM-like but enough that one feels that one is not playing the original. Some of the traps were very nice (although, for the regular DooMer, alarm bells go off when seeing something like a rocket launcher sitting in the middle of a large red pentagram, with no enemies in sight) and left barely enough room for the player to maneuver. Other areas, such as the one behind the blue-key door, give the player the option of staying behind the door and sniping, or running in and doing the whole duck-and weave dance while blasting away with the pump-action shotgun. [I tried it both ways, and obviously it's a lot more fun when you're in the thick of the fighting, not knowing if that imp fireball that's barrelling towards your back is the last thing you'll ever see.]
There is generally a fair amount of health, armor, and ammo. There were times, however, when my health was .... how should I put it? ..... unhealthy and there were no medikits or medipacks to be had for love or money. [I even tried asking a satyr, in my politest tone of voice, if he would let me reach over and grab the health satchel right behind him. All I got in return was a swipe across my face with a clawed fist. Bastardo! See if I'll be courteous any more.] But overall, if one plays with care, the map is not difficult. As with earlier maps, I used only a pistol until I skewered my first sergeant, and only the shotgun until I picked up the chaingun from a chaingun zombie. I never used the double barrelled shotgun, as this is only found in a secret area. And even though the rifle was not in a secret area, I did not use it because it made most of the fights too easy.
This map was a gas to play. There was a nice mix of cannon-fodder enemies, tougher enemies, and opponents approaching mini-boss status. And all in situations that I thought were fair and occasionally tough. If I had to rate the difficulty of this map compared to the previous maps I would say that it is on the easier side, with the authors giving the player enough room to retreat or maneuver in the tougher battles. I might have made the two "epic" battles a tad more challenging as follows - I would have locked down the area with the Rifle, requiring the player to dodge and shoot in somewhat close quarters, and opening the door after, say, one minute. And I would have thrown in some more enemies with projectile attacks in the open area outside the exit building. [The way it was set up, I was not required to do much dodging, I could have evaded the enemies and run into the building, and I was easily able to circle-strafe around the enemies while taking pot shots at them. Had I chosen to use the DB shotgun, the rocket launcher, or the Rifle, the battle would have been over almost before it had begun.] I shall play this map again with a pistol start, and perhaps on UV skill, for more of a challenge. In other words, the map has definite potential, and deserves to be played again.
I am not one to look for bugs, but there was one that I could not help but notice. In the outdoor area leading to the exit building, Lost Souls teleport into the hilly section once the player unlocks the side door. Unfortunately, because the linedefs for the hills have been flagged impassable to prevent the player from jumping off the crates onto the hills, they also prevent the Lost Souls from entering the arena to attack the player. I was easily able to pick them off without any risk to myself (and it was easier still to let them destroy each other. Even though monster-infighting has been turned off for this map-set, enemies still take damage from each other consistent with the original DooM).
This is not a bug at all, but I wanted to point out that in the area with the nukage channel (at the far end of the area behind the blue-key door) I found that some of the enemies with only close-range (melee) attacks (i.e., satyrs and stone imps) found their way to the other side of the channel, where I could pick them off at my leisure. This obviously diminished the challenge of reaching the switch.
Wow Factor: The scenery and the architecture aside, this map has a plethora of new stuff that made me grin with fiendish glee. Let's start with the weapons. There are two .... yes, I said two... new guns, each more powerful than the other. There's the old saddle-horse from DooM2, the double-barrelled shotgun. The KDiZD team has created new graphics for the weapon, and has beefed up the blast sound. Of course, the clink-clink of spent shells adds a nice touch. For being the creation of an amateur team the sprites were remarkably well done (as is true of most of the artwork from this group). The other new weapon is the powerful Rifle, which takes Slot 7 in your arsenal, replacing the BFG 9000. This one seems to slice through opponents like a hot knife through butter, and is a welcome addition to an already stellar cast of goodies.
There is just one new enemy, but the new weapons kept me as happy as a six-year old at a toy store, and I didn't mind in the least. [I do believe I am getting spoiled with all the new stuff, and so don't blame me if I burst into a fit of petulant rage when the goodies stop flowing.] This enemy, the Dark Imp, appears to be a marginally altered version of the creature from the ZDooM Monster Resource wad, in that the fireball seems to have some tracking ability. Not as much as the one from the Soul Harvester, but it's definitely there. I'll need to look at the DECORATE definitions to confirm. Regardless, it is a tough new adversary that I look forward to meeting again in future maps. I just hope I have my shotgun clutched tightly to me when that happens.
[EDIT: I forgot to mention that E1M9 pits you against the familiar Hell Knight of DooM2. For most of us this is not such a new thing, and therefore not so much of a Wow Factor. Still, it was cool to fight a DooM2 enemy in DooM.]
[SECOND EDIT: I also forgot to mention a couple of Easter Eggs, that do not officially count as secrets. As you exit the start area towards the outdoor imp cage, look for an unusual-looking switch. Press it for a zany surprise. Also, in the crates surround the imp cage look for something that resembles a lap-top computer. Press it to get a wacky message.]
So, the two of you are undoubtedly awaiting my sage words of conclusion. I have two words - "Good show!"
You're still here? What are you waiting for? Go out and play the map again.
MapZ1M4: Command Control
Atmosphere & Architecture: I know that this is beginning to sound repetitive, but this map is consistent with the previous ones in the mood that it delivers. It is expansive in parts and claustrophobic in others, dark and shadowy where it needs to be but poperly-lit elsewhere. It invites exploration, and is often tense and unnerving. The skies have darkened, suggesting the passage of time as the player makes his/her way from one map to the next. The feel of the map was both DooM-like and something different, a pleasant mix of nostalgia and wonder.
The architecture is very well done, and the original E1M4 areas have been skillfully enhanced with struts, supports, beams, computer panels, consoles, and the like. The look is very much in keeping with a futuristic military command center. There is a staggering use of sloped walls, and for the most part this is executed with craft and care. However, in many instances of steeply sloped shapes the textures (flats, really) were stretched to the point of looking unnatural. The use of the ZDooM specials Sector_SetCeilingScale & Sector_SetFloorScale could, in many instances, have reduced this stretching effect. Regardless, this is a minor point that only temporarily detracts from the look of the various constructs, which are generally superb.
Map Design: In a twist on the original E1M4, and a variation on the progression that we have seen in the earlier maps, the player does not enter familiar territory for a while. I actually enjoyed exploring the initial areas of the map, waiting to see when I would go "Aha!" And when I actually stepped into the part of the map that mirrors the original, I didn't realize it at first. In fact, for quite a while I was disoriented, having expected to enter the familar areas from the "conventional" E1M4 start area. I actually liked being off-balance and recognizing familiar areas only as they unfolded gradually because of my disorientation. In this way the map took on a completely different feel from the original. I rate this as a positive aspect of the map's design, and the authors deserve credit for this.
Of course, I would be remiss if I did not point out that the map has vast areas to explore beyond the confines of the original E1M4. And because at its core the design emulates E1M4, it also features the great connectivity and the possibility of multiple routes to a destination that were the hallmark of the original. Again, the authors have set the core E1M4 areas as the hub from which the player can explore the various spokes of the map.
This map does not disappoint in the secrets department. There are 7 secrets in all, and while most of them are to be had for the taking by observant players, at least one of them is not intuitive. I speak, of course, of the infamous yellow door secret. Aside from actually entering the "true" secret area, even getting inside the yellow door is ..... how should I put this without giving anything away .... a head-scratcher. I spent an awful amount of time looking for the dadgum yellow key, only to discover that ..... Well, I'll let the player discover that for him/herself. I particularly liked the backpack that is visible in the secret area in the computer room, enticing the player like a ripe fruit that seems just out of reach. But then, I do like those kinds of secrets.
Gameplay: If you're looking for a fight, you'll get it in this map. Almost immediately upon leaving the entry point you are beseiged by a legion of hoofed and clawed enemies who are intent on extracting your guts and handing them to you on a platter. And thereafter you will be confronted with a steady stream of opponents, ranging from easy to tough. There are many fights when you will be surrounded, and will need to hack, shoot, and kick your way out of the mess into which you've unwittingly walked. But overall, the fights are fair (but see below for a possible exception) and you get plenty of goodies with which to deal with your foes. The authors have used enemy teleportation very nicely, and I often found myself hemmed in between monsters both front and back. This calls for some nimble footwork. Of all the maps so far, I found this map to have the perfect difficulty level for the skill at which I played the game, i.e., Hurt Me Plenty. In other words, it is like when Goldilocks tastes the final bowl of porridge, and declares it "Just Right!"
Overall there is a good balance of health, armor, and ammo. In with earlier maps, my health occasionally dipped into the red zone, but those were typically the times when I was taken by surprise by the multitudes of denizens that infest Command & Control. There is plenty of ammo and armor, but I still recommend playing with some discretion. If you begin the map with a pistol-start I highly recommend that you make every shot count, as you pick up a chainsaw and a beserk pack quite late in the game, making any ammo shortage you face potentially fatal. [There is a berserk pack in a secret area that may reduce your dependence on ammo.] You pick up the shotgun right away, and never need to use your pistol; you pick up the chaingun soon after, and these will be your mainstays throughout the game. The rocket launcher is, for the first time in this map-set, not in a secret area, but the double barrelled shotgun is. I used the rocket launcher sparingly, and the DB shotgun not at all. And even though I had picked up the rifle in the secret map, I did not use it.
A couple of things that I might have done differently in the gameplay department. First, the sole chainsaw zombie is to be found after the player has almost completed the map, and there does not appear to be another chainsaw in the map. If the point of the chainsaw zombie (or the bererk pack nearby) was to provide the player a means of conserving ammo, it came a little too late for it to do much good. Second, the fight near the exit could have been very unfair if the player went into it with low health and ammo. Worst-case scenario is the player is trapped with fairly tough enemies in close quarters with only a box of bullets for the chaingun, and the chainsaw. Not very good odds, and a situation where the player's entrails could easily end up plastered all over the walls. It would have helped to have an extra box of bullets or a few extra shells, not to mention a medipak before the player entered the exit room. I will make sure that I am adequately prepared the next time I go back. Which I intend to, and I wholeheartedly recommend you do as well.
Now to bring up an aspect of the map that I did not like. You can mess things up good if you fall into the nukage after collecting the red key. [This is the channel with the bridge over it that leads to the Mines and the red key.] The nukage level drops after you press the switch (near the red key) to lower the column with the blue key. Not only is this fatal for the player that accidentally falls in, it makes it necessary to find the double-barrel shotgun secret before the nukage level has dropped. In my opinion, I found the lowering of the nukage to be completely unnecessary - unless the authors intended for the secret to be accessed only before the switch was pressed, which again, I found to be unnecessary. Also, the dimly lit switch next to the red key was unnecessary, as all it seemed to do (other than lower the nukage level) was lower the column with the blue key, which was already behind a keyed door. If the player forgets to press this switch, I guarantee that the ensuing seach to lower the column will be a nightmare.
Wow Factor: As I said before, the earlier maps have been spoiling me, to the extent that I want to see new stuff every time I fire up KDiZD. This map seems somewhat scarce in the Wow Factor category. That's not to say that you won't go: "Whoah!" when you see some of what the authors have done with the way the map looks. It's just that you'll miss the steady stream of goodies to which the previous maps have made you accustomed. Not having new stuff is not a negative for this map. Just something I noticed by its absence.
And now a couple of edits. I failed to mention that starting with Map Z1M1 there has been a new enemy that is a variant of the standard Zombie Man, except that this one fires its weapon at a somewhat faster rate. Now you may ask what the big deal is with an enemy that is a minor variant. The answer lies in two things - first, the variation makes the game just that much more different from the original. Second, the team has put in a great deal of effort to make good-looking sprites for that "minor variant". My other edit pertains to the fact that I neglected to mention the presence in Map Z1M9 of the Hell Knight, which (as all good DooMers know) is to be found only in DooM2, not in DooM. For those of us accustomed to playing wads mostly designed for DooM2, the Hell Knight is a commonplace enemy. But for someone that has just crawled out from being buried under a rock since 1994, the Hell Knight definitely rates a "Wow!"
[Second EDIT: This map features several convincing-looking "fans" complete with rotation and sounds. This is something that is both a clever architectural detail, and rates highly on the Wow Factor. Some of you may point out that fans built the way they are in this map have already been done before. That still does not make them any less cool.]
In summary I will say that this is a large, good-looking map, that is relatively straightforward to navigate and offers many nice battles, some in tight quarters. Entering the familar areas of Z1M4 from a place different from what I expected resulted in some disorientation, which I actually found to be quite a pleasant experience, as it allowed me to "rediscover" E1M4. Definitely a map to be played again.
MapZ1M5: Phobos Lab
Atmosphere & Architecture: This is a mostly dark and gritty map with brooding indoor areas as well as some nice new outdoor areas. The map opens outside the Lab, and the skies seem to have brightened a bit, but the sense of foreboding remains present. Stepping into the shadowy interior heightens that sense, and increases one's watchfulness. Some of the memorable atmospheric features of the original E1M5 have been retained, particularly the spooky room near the exit. There was nice pacing in the gameplay (more on that later, of course), which allows time to look over one's shoulder in anticipation of the next wave of heathen scum as one makes cautious progress. The great thing about playing a map for the first time is that feeling of not knowing what's around the corner, and this map offers that feeling from time to time.
The architecture in this map is consistently good (which is how I feel about all the other maps too, as a matter of fact), but varies from the others in the degree of detail. Don't get me wrong, there are plenty of wonderfully built areas, some of which have a sense of real space. [In particular, I liked the large tunnels through which the player has to travel near the start area.] But this map has definitely toned down the addition of "extras" in the architecture arena. Those people that may have felt that the detailing in earlier levels was excessive and simply there for its own sake should be right at home in this map. While definitely not minimalistic (as were the original Episode 1 maps), in my opinion the work put into this map enhances the original, and provides a fresh new interpretation of a classic.
Map Design: Going back to the tradition of the earlier maps [with the exception of E1M4] this map puts you into the "normal" E1M5 start fairly early in the game, and for a while the progression is very similar to the original. The authors have created some very interesting twists to the map, converting some areas that were secret in the original to areas that the player is required to traverse. The "core" aspect of the original has been maintained, and of all the maps in the set so far this one has a progression that most closely resembles E1M5. This makes for an easy familiarity, while providing enough changes to prevent the map from being simply a clone. [I know this really doesn't belong in the Map Design section, but I don't really know where else to mention it, so I'll briefly say that I really liked the illusion of the crate "bobbing" in the nukage near the map start.]
The secrets in Z1M5 are for the most part relatively straightforward to find, especially for the observant and the patient. Some of them (e.g., the invisibility orb) seem almost not to rate as secrets. But there is a cool secret that, like the yellow-key door of Z1M4, will have you stroking your chin in puzzlement. I also liked the secret with the grenade launcher, as it is in plain sight (in a manner of speaking) and just requires a little bit of imagination on the part of the player. While I enjoyed hunting for the secrets (some of which were obvious homages to the secrets in the original E1M5), I felt that having the double-barreled shotgun in a secret area was unnecessary. [Yes, I know that you're all going to say that the secret is one of those in the original E1M5, but putting it in a secret area means that the player does not get to use the weapon in any map till perhaps Z1M6, unless the player finds the secret area in each map.] I would imagine that it's about time in the map-set the player is given this cool new gun.
Gameplay: The map has some nice surprises in terms of enemy placement, and on more than one occasion I found a phalanx of the enemy before me and my retreat blocked. I particularly liked the placement of the enemies behind the blue key, and no place for the player to duck behind as s/he advances to the key. [To provide a bit more of a challenge I would have used some more powerful enemies instead of those used, as these latter can be relatively easily blown away.] I also liked the enemies that show up once the door at the nukage area (the one with the blue armor and box of bullets) is opened - fighting them while "treading water" was a different take on what would otherwise have been a straightforward battle. Overall, while there were some tight fights and some of the tougher enemies, the difficulty level was moderate to somewhat below that. In fact, I'd rate this map as among the easier maps so far. [Of course, the great thing about finding a map a tad easy is that one can always go back and play it again at a higher skill level, with a pistol start, or with just the basic weapons. Which is what I indend to do later.]
In a departure from earlier maps, you start packing your arsenal right from the beginning, in the form of a shotgun and a chaingun as plain as the nose on your face. Armed with these little suckers, and fed with a steady dose of ammunition, you can pretty much dominate the map. Add to that a rocket launcher that is not in a secret area, and you have some serious firepower. If you find the secret areas (one of which is actually fairly early in the map) you can also add a super shotgun and a grenade launcher to your hardware. I played the map with only the shotgun and chaingun, and did just fine. I was itching to try out the grenade launcher, but refrained from doing do as it was in a secret area, and it would have skewed my review. As it is I found the map to be somewhat easy on Hurt Me Plenty skill level, as I've already mentioned. [The appearance of the Cacodemon was, in my opinion, a nice touch. I hope that's a promise of things to come.]
Wow Factor: Did I mention that this map features the grenade launcher. Yes, it's in a secret area, and yes you find it only towards the end of the map when you've already decimated most of what is available to decimate, but it's still cool to try it out. I like the fact that there is some risk to the user, mainly in the form of the grenade bouncing back to rip out your cojones (pronounced co-ho-nes, in Español) and fill the rest of your genitalia with shrapnel. The limitation, at least in my eyes, is that the grenade can only be made to bounce at or below the floor level on which the player fires it. In other words, you can't aim it upwards to send it in through a window. Now that would have made it an even more devastating ally. Still, it's a cool new toy, and I'm looking forward to using it in future levels.
[EDIT: One of the secret areas in this map features a Mega-Sphere. For players of DooM2 this has mere novelty value, but keep in mind that this is not originally an Ultimate DooM artifact. Much like the Hell Knight.]
So what can I say about this map that's pithy and sage? I liked the obvious nods to the original E1M5, and I enjoyed many of the fights (though they occasionally tended to be on the easy side). In summary I'd rate this map as somewhere in the middle of this pack. And that's saying something, as the pack rises head and shoulders above the humdrum maps that tend to be released.
MapZ1M6: Central Processing
In a departure from my previous reviews of KDiZD I did things slightly differently while playing Z1M6. As I usually do when I intend to review a game, I take plenty of notes as I go along. However, in the earlier maps of this set I completed each map, then wrote up from memory the things that struck me most. In Z1M6 I returned to my humble roots of committing points of interest to paper rather than memory. You will probably see this come through in the following review, as I provide more examples to illustrate my points. This method interrupts the flow of the game (and to some extent my enjoyment of it), but in the interest of a more detailed review I was willing to forego my own desires. I hope the two of you appreciate the sacrifice I'm making.
Atmosphere & Architecture: In a return to a large, battle-scarred military installation, Z1M6 opens with skies that seem to be lightening with the Dawn. There is a wonderfully-rendered distressed feel about the place, from the large section of broken wall in the nukage processing area that allows the nukage to spill outside the building, to the partially open door nearby that is angled open because of damage. These are examples of inventiveness and imagination that pervade this as well as other maps in the set. And let's not forget the very nicely done "shafts" of light that stream down from the skylight in the ceiling, cutting through the murkiness of the indoor atmosphere. There is a creepy feeling to the mines (leading to the battery), and the maze that leads to the yellow key was eerily reminiscent of the maze in the original E1M6. Furthermore, the clever use of light transfers enables the many pits and mine shafts to take on a natural-looking light shadowing.
The authors have done a magnificent job in making the place look real. The outdoor mining area, complete with a convincing-looking crane, was quite a sight to behold and I spent long moments taking in the scenery. And while this is not the first time it was used in this map set (and I apologize for not mentioning it in my earlier reviews), the authors have used stacked sectors to good effect. [For those readers that may not know, stacked sectors are a feature of ZDooM that allows the illusion of floor-over-floor, aka 3D spaces.] There are many instances where the player walks over glass floors, below which are "circuit wells". This is both an architectural feature and a Wow Factor. There is even one piece of "machinery" at the indoor mine shafts (near the silver key door and the super shotgun) where the timing of the lights, piston, and sounds are perfectly synchronized to add to the level of realism.
Map Design: The one thing that struck me about this map is how, even though the core areas of the original Z1M6 have been incorporated, it looks and feels so totally different. Some of it has to do with a marked departure from E1M6 in the progression of this map, so that even when you enter one of the "original" areas you sometimes don't realize that you've sone so. In this way Z1M6 is closest in design to Z1M1, which also integrates whole new areas seamlessly with the originals. It sort of reminds me of the Borg from Star Trek, which take a life-form or habitat and assimilate it into their collective so that it is transformed to something new while retaining some vestiges of their individuality. In this regard I need to go on the record to add that I did not mind in the least that this map does not look or feel like E1M6. Whether or not this will be construed by the authors as a compliment, I leave for the reader to decide.
The map has a nice connectivity to it, but for that reason it can also be somewhat confusing. This is made more so because of the key hunt that is required for the various security authorizations. However, there is a linearity to the progression that makes the key hunt more palatable and manageable. And once you reach the switches to acquire the authorizations, the objectives of the map become abundantly clear. There is also a clever side mission in terms of a search for a battery to restore power to the mines. [Did I say linearity? Yes I did, but that is only in terms of the direction that the player takes. The structure of the map itself is very non-linear, with areas you return to as you move forward, and areas that you see that are not at first accessible.] The map is very large, and lends itself to exploration, which is its own reward (especially with the care taken to make the map look so good).
In terms of the number of secrets, Z1M6 is in the middle of the road with seven of them. For the most part they are not difficult to find, provided you use the clues provided by the authors. For example, in the area where the nukage flows out through a hole in the building wall, why would there be a radiation suit nearby if you can make your way safely across on the ledge? I thought that the secret at the outdoor mine shaft with the crane was quite inventive. [However, it would have helped to let the door stay open after the player has exited the secret area. I had left some goodies inside, and to get them I had to get into the secret area in the same way, losing some health in the process.] The storage room secret, however, messed me up as it is a one-shot deal. I had to restart from a previously saved game so that I could score that point.
And now a mention of something that may either be an Easter Egg or something that the authors did not intend at all. It is possible to pick up the blue key without getting the beta-level security clearance. [All I will say is .... barrels can sometimes be your friend.] If you take advantage of this "loop-hole" you will cut out a fair chunk of the Western portion of the map, but will also miss out on some fine architecture and fun battles.
Gameplay: From the surprise that awaits you when you open the first door, to the one that's at the top of the elevator near the silver key, to the one that lurking at the bottom of the elevator before the exit, this map has a goodly share of traps and scares. Some of the fights are very tight, against tough enemies, in places with little room to maneuver. In particular I liked the situation when the super shotgun is picked up. It was an excellent use of a tough enemy teleporting behind the player, giving him/her just the right amount of space to move, without making the fight frustrating. This is true throughout the map - tough fights that, for me at least, pitted me against well-balanced odds. Some of the fights were in very dark areas, where the Shadow Imps were a perfect foil to my heavy weaponry - after all, you can't shoot what you can't see.
This map provides a very fine balance of health, armor, and ammo. Several times I found myself scrounging and back-tracking for health. There were at least two instances when I entered traps with less than 20% health to face enemies such as Hell Knights, with little room to escape. In particular I did not like the situation at the top of the elevator near the silver key; I had to restart the game several times before I survived it. Ammo is also quite tight. Now I do admit I was playing footloose and fancy free with my guns, but this map was the first one where I saw a potential shortage of ammo. Nothing fatal, mind you, but far tighter than earlier maps. There is plenty of rocket ammo, but as the weapons that use them are only to be found in secret areas or are practically at the end of the map, this was of no use to me. Also, there is a fair scattering of Rifle cartridges, but as the weapon itself is in marked abeyance, the ammo did me little good.
The player can finally pick up the grenade launcher without it being in a secret area. Unfortunately, in my opinion, it comes too late in the game. [Note that you can pick up the GL earlier in the game if you find the secret area, but if not you'll have to wait until the end.] Also, I did not like the fact that the only rocket launcher in the map is in a secret area. For players with pistol starts and no secrets, the going will get quite difficult, indeed. Thankfully the super shotgun was available fairly early in the map, and that became my work-horse through much of the slug-fests that I went through. The chainsaw eased the ammo situation somewhat too.
And now a minor peeve. When I first entered the building I came to a fork in the road and I took it. [Hears the sound of a cymbal clashing.] But seriously, folks ..... when I first entered the building I veered left towards the open area with the mine shaft. In so doing I found myself playing with just a shotgun, and ammo for it quickly getting scarce. I was forced to back-track until I came to the room with the red key and the chaingun. My point is that a player doing the map for the first time could easily go through a quarter of the map before picking up the chaingun, and this could make things very frustrating. I understand the placement of the chaingun was done as a tribute to the original E1M6, but in this case perhaps the authors ought to have reconsidered. [Still, the fight in the red key room was quite satisfying, especially making them imps do the chaingun cha-cha.]
Wow Factor: Just when I though the KDiZD team was running out of new things to feed my voracious appetite I run across your friendly, neighborhood Hell Fury. So, in my customary sociable fashion I invite the guy out for a beer and some Buffalo wings. [No, as far as modern science tells us, buffaloes do not grow wings. This is merely the appellation given to a spicy chicken wing dish that originated in Buffalo, NY.] Instead of offering a gracious acceptance in return, the sucker side swipes me before hurling triple fireballs that tracked me down under the desk that I was hiding. Well, I told myself, "No more Mr. Nice Guy!" So, after I was done beating the crap out of the hapless fellow with the stock of my shotgun (after softening him up considerably with a liberal sprinkling of hot lead) I was pleasantly surprised to find his head rolling off his shoulders. Now if only I could have kicked it across the courtyard, a la Blood. Ah, what savages society makes out of us!
Another Wow Factor is the use of "phased" or moving lighting in the red key room. While this is not a new aspect of ZDooM, it is IMO severely underutilized in the typical map release. What makes it so cool in Z1M6 is the way the light moving up a vertical column is synchronized with the light moving across the connecting horizontal vestibule on the ceiling.
And now, a few edits regarding earlier maps. I failed to point out a couple of slick Easter Eggs in Z1M9 that are quite amusing. Also, Map Z1M4 features some very convincing-looking ceiling fans that I had overlooked during my review of the map. Map Z1M5 features a Mega-Sphere in a secret area. I have updated my review of those maps to include these points.
This review has already rambled on for more than it ought to have, and will someone please put it out of its misery? A well-placed Rifle cartridge between the eyes should do it. Ah, but I jest. I enjoy writing these reviews almost as much as I enjoy playing KDiZD. And enjoy Z1M6 I surely did. Knowing what I do now, I definitely intend to play the map again, and I encourage you both to do the same. So finally, in the immortal words of Edward R. Murrow, I bid you: "Good Night and Good Luck."
MapZ1M7: Computer Station
Atmosphere & Architecture: The atmosphere of this map is definitely brooding, and while being DooM-like in many areas it also assumes its own unique personality. However, I felt that the map relied too heavily on excessively dark areas for its mood. If Z1M6 was dark, then Z1M7 is an abyss, and while that lends an aura of fear to a map when used in moderation, it makes for an univiting place when used in excess. Unfortunately, I feel that's the case in Z1M7, to the point that I now have a headache. [Whether that's from peering at the difficult-to-see things on my monitor or the length of the map, I don't quite know.] Still, the map succeeds in creating a tension that occasionally borders on mild panic. The periodic seismic activity does nothing to put the player at ease, and there is a constant undercurrent of unsettledness (is there such a word?), all of which are good things.
If the atmosphere is somewhat disappointing, the architecture is quite another story. From the cavern in the beginning (with nicely-done shadowed lighting from the lava) to the spectacular-looking "reactor core" area near the green key door, the authors have paid attention to detail. There are very well done computer columns, circuitry, ductwork, and other accoutrements of a convincing-looking computer station. The ceiling lights above the nukage pool in the area behind the silver-key door alone are worth mentioning for their wonderful look. As with Z1M6, this map has plenty of evidence of damage, from pits on the floor to chunks of ceiling that have collapsed. The map is rife with supports and columns and overhead beams, and much of the machinery and computer hardware is as realistic-looking as DooM will allow.
Map Design: This map has a distinct appearance of the original E1M7, and the map design contributes to that in large part. The scale and texturing of this map play a role in that, of course, but there is enough of a difference to make this map quite distinct. Again, at the core of this map are the key (no pun intended) areas of the original. In their own inimitable way, however, the authors have put in plenty of twists to set this map apart from the original. I liked the inventive way by which the player was required to take a detour to pick up the yellow key and the rocket launcher. But in a departure from E1M7, this map has no outdoor area whatsoever. Do you realize this is the only map in KDiZD so far that has not had an outdoor area? I kind of missed seeing the sky and the mountains of Phobos.
Consistent with the original, this map is very non-linear, with a great deal of connectivity. There are areas you see (e.g., the platform with the green key) that you know you'll be returning to later. But it is because of this very connectivity and non-linearity that the map takes on an aspect of gameplay (more on that later) that some may find annoying - repeated backtracking. What's that you say? The original E1M7 required a great deal of back-tracking, so why shouldn't Z1M7? The answer, in one word, is map size (OK, so that's two words. Sue me.) E1M7 is a fraction of the size of Z1M7, so that any back-tracking takes on quite a significance. And Z1M7 requires repeated zig-zagging from one end of the map to the next like a fly in a bottle. I wonder if, perhaps, the authors could not have designed the map to reduce the number of times the player is made to go back and forth.
Now on to secrets. Almost topping the list in terms of number of secrets, this map has a whopping 10 of them. I found the secrets to be difficult to find, and many of them have obscure clues. [For example, the method of reaching the Rifle in the secret area was not intuitive at all.] However, there were some very cleverly concealed secrets, including the berserk pack near the green key. It requires a leap of faith to reach it, if you get my meaning. [However, re-raising the laser barrier to the green key area was unnecessary.] The secret with the experimental M-4000 Laser Cannon, and the subsequent message were quite amusing. Also cool was the secret area with the green armor that is visible across from the lava cavern.
Gameplay: In a momentary flashback to Z1M3, I felt that I was going around in circles. Picking up the silver key and shlepping across the map to the silver key door. Taking a wrong turn there and reaching the super shotgun area only to realize that I need to head all the way back around to press a switch to open a door near the super shotgun. Picking up the red key and heading in the opposite direction to press the switch to reach the green key, then heading back to the red key area to pick up the blue key, then back to the vicinity of the red key door. Well, you get the picture. Although many of the occasions that require back-tracking also feature some nice fights, overall my enjoyment of the map was diminished because of what I considered senseless retracing of my footsteps. Thankfully the layout of the map was not confusing, and finding my way around was a lot easier than in Z1M3.
That's not to say I didn't have a good time. Many of the fights were challenging and fun, not the least of which were the traps at the soul sphere and right before the exit (the one with the Cacos. I especially liked the way the lights dimmed, signaling something ominous.) I also liked the fight against the shadow imps in the darkened areas at the beginning. Ammo is very tight at the beginning, but gradually eases up as the map progresses. Armor is in abundance, but health tends towards the scarce side, especially if you have a tendency towards reckless play. At this stage in the game I feel familiar with the enemies, and believe I have gauged their strengths and weaknesses. This allows me to play less cautiously, and that may account for why I thought there was only a slim margin of health. After picking up the orange key, in particular, I felt there should have been some health in the areas that opened up. At one point I was running around with 1 health point, and I was easily taken down by one of the enemies that had spawned. A zombie man, no less. Oh, the shame of it!
Armaments are also in abundance. You pick up the shotgun right away, followed relatively soon after by the chaingun. The rocket-launcher, double-barreled shotgun, and chainsaw round off your hefty arsenal. Once again, however, the authors have chosen to leave the very elite weapons in secret areas. The Grenade Launcher and the Rifle are both present, and there is ammo aplenty for these guns, but they're not going to be much use to you if you don't find the weapons first. It is clear that the authors have made a conscious decision to keep these weapons hidden in each map so far (except Z1M6 - see above), but I wonder if, by making them available to us only in secret areas, they have not deprived us of even more fun.
Wow Factor: There's nothing to see here. Move along.
Actually, to be fair, there's quite a bit to see in Z1M7. While there may not be any new goodies to use or destroy, there's plenty to marvel at. I recommend you do a -nomonsters walkthough of the map, and use a pair of light-amplification goggles when you do. You'll be amazed at how well done many of the areas are. Of course, finding the M-4000 Laser Cannon, while strictly not being a Wow Moment, was cool in its own campy way.
[EDIT: It occurred to me only after I had completed the game that I had not found the regular exit, just the secret exit. I suspected that there was just one exit, and that through clever scripting the authors sent players with high cumulative stats to the super secret MapZ1M10 whereas the rest of the scum were relegated to the next map in the series. I have confirmed this, and am happy to add this to my Wow Factor list for this map. To my knowledge such a thing has not been done for cumulative stats in any other DooM mod. That, alone, rates a Wow! Not to mention setting up the arrays to collect and calculate the stats.]
If I came across as somewhat negative in my review of Z1M7, it was not my intention. My opinion of the map was colored by two things I didn't like - the overuse of very dark areas and relentless requirements to back-track. Unfortunately, they tended to overshadow so much of the map that I loved, including the fabulous architecture and the intense fights. As with Z1M3 I will be slow to come back to this map. But when I do, I'd like to play it from a pistol start and use all the weapons I find - even those in secret areas. I think I'm going to need them.
MapZ1M10: Penultimate Evil
Atmosphere & Architecture: As you quickly figure out when you enter this map, you ain't in Kansas anymore, Toto. As a matter of fact, you ain't on Phobos either. In a clever twist, the authors have put you on Deimos, the second moon of Mars (and also the setting for the second episode of DooM, known as the Shores of Hell). In keeping with the original E2, the sky is blood-red and the mountains are rocky and desolate. There is also an abundance of lava, which is more a feature of E3 than E2, but it fits very nicely with the overall theme of the map. There are numerous touches that are consistent with a slow takeover of a military installation by demonic forces. All-in-all, quite nicely done.
As with the other maps in this set, the authors have taken pains to add appealing details. In particular I loved the marvellous area with the two Hell's Furies, and the central column with the dome & inverted dome - the one where the domes rise & lower respectively, and the green energy beam arcs between them. The tower hiding the Bruiser Demon and the blue key, the final battle arena, the cavern areas, the domed blue lights behind the blue key door - the list of architectural delights goes on. This map is one more in the list of maps in this set that deserve a -nomonsters walkthrough to admire the scenery. Architecture is clearly one of the major strengths of the Team.
Map Design: This map is a nice tribute to the other episodes of Ultimate DooM. From the initial area with the lava that hearkens back to E4M2, to the crate maze and damaging corridors of blue lights from E2M2, to the automap "claw" of E3M2, this map is brimming with references to the other episodes. But it also stands on its own as a very well-executed map. It is both linear and non-linear - linear in that the player must take a generally defined path from one objective to the other (reducing confusion, which could occur in a map this size); non-linear in that the map is very well connected, and areas that cannot initially be opened are eventually opened from the other side, thus bringing the player back full-circle. There are also a few alternative paths (especially behind the blue doors and the red doors) that make for non-linearity without being confusing.
There are a healthy number of secrets in this map, and some are very cleverly done. In particular I liked the secret area with the blue armor on a ledge - very Quake-like. Two of the powerful weapons can be had fairly early in the map if you find the secret areas; thankfully they're both available during the normal course of play, although somewhat later. A third weapon, the Rifle, is in a secret area that can only be accessed from another secret area. I'm sure you're tired of hearing me say this, but it's a pity that the Team decided to hide every single Rifle in the game. Especially when they pit us against some bruising opponents.
Gameplay: If you thought you were clever in being able to find the super-secret tenth level, you may actually wish you hadn't. And I mean that in the best possible way. There are some very intense fights, against some very tough odds. But if you can't stand the heat, this ain't no picnic. [Oops, there I go mixing metaphors again.] There are two fights in particular I would like to highlight. The fight for the yellow key was difficult, and I had to reload my saved games many times after I'd perished at the hands of lowly hit-scan enemies (mainly those goldarn chaingunners). Once I figured out that I needed to concentrate my fire-power on them at the beginning of the fight, I evened my odds considerably, and managed to limp away with just a minor whipping and my tail almost between my legs. Quite humbling, I must say, but ultimately very satisfying. The good thing is that this fight requires not just skill, but some luck as well. In my opinion this is a good thing that makes the game more exciting. After all, who wants to play something where the outcome is a foregone conclusion, eh? Kudos to the Team.
The other fight I want to talk about is the final boss battle. I approached that fight every which way I could, and failed every time. I used every weapon at my disposal, including the Rifle (which is in a secret area, and, according to the rules of my reviews a weapon I ought not to have used), and each time I found myself being served as toast to four very hungry and voracious Bruisers. I even tried hiding in the area to the side of the arena and sniping, but it was no fun. Moreover, one of those ground attacks climbed the fucking wall and found me where I thought I was safe. Finally, I hit upon the old circle-strafe technique and slugged it out with them until the sun was almost setting on the mountains of Deimos and I had finally vanquished my foes. I have mixed feelings about this fight. On the one hand it is very challenging, and fighting four Bruisers in the open is a quick way to sign your own death warrant. [Given the paucity of health and armor in the arena, and the viciousness & brutality of their attacks, this method is definitely not recommended.] On the other hand, circle-strafing with my grenade launcher and keeping them inside the island became very tedious and virtually risk-free. I would have preferred to have more health and armor and a couple of places to duck behind. That would have made a fight in the open more balanced and more fun.
Thankfully the authors give us plenty of goodies with which to play. Starting off with a shotgun right away and a chaingun soon after, you'll be more than adequately armed to deal with the opposition that you'll be facing initially. Unfortunately, there is a dearth of armor for a good portion of the map (and no, the armor in the secret nukage area does not count). Also, those are the only weapons with which you'll be armed when you come face to face with a couple of Hell's Furies (thankfully not simultaneously). Better hone up on your strafing and dodging skills, as you'll get very little health for the next battle. Later in the map there is a decent amount of health and armor to be had, and ammo is plentiful. You'll also get a rocket launcher and a grenade launcher, and believe me, you'll be needing them both. [A side note here, but I wanted to mention that I really liked the location of the blur artifact on the "bobbing" column of rock. Getting on the rock is easy, getting off it is the challenge.]
Wow Factor: I'd have to say the biggest Wow! in this map are the Bruiser Demons. With cool graphics, new sounds, three kinds of attacks, and a terrific death sequence, they certainly added a great element to the game. Having learned my lesson from my first encounter with the Hell's Fury (see Z1M6, above) I approached my first Bruiser Demon with caution. It became immediately apparent that the creature harbored a great deal of resentment towards humanity, bordering on mucho hostile intent. Foregoing my assumed role as Earth's ambassador to the alien world, I proceeded to terminate the subject with extreme prejudice. It took a while, but I had fun doing it. Hey, who says you can't enjoy your job?
[Now in an edit of my review of Z1M7, I have added to the Wow Factor section. This is for the scripting that resulted in the game being able to determine if a player has acquired sufficient stats to qualify for the super-secret MapZ1M10.]
In closing I'll say that this is a wonderful level that combines tense battles with terrific map design to create a map that you'll definitely want to play again. And seeing some familiar areas from the other episodes of Ultimate DooM is a huge bonus.
MapZ1M8: Phobos Anomaly
Atmosphere & Architecture: Of all the maps in KDiZD, I'd have to say that Z1M8 probably rates among the top in terms of atmosphere. Of course, there's the wonderful night sky with the moon, presumably Deimos. But the scenery doesn't end there. The game takes you on a detour to Deimos itself, with the blood-red skies and stony mountains, and then brings you back to Phobos. Only this time the night sky is reddening with the Dawn. There are the ever-present signs of demonic influence, from the nicely rotating "organic" columns rising out from a cracked floor to the cool effect of organic goo spilling out of a wall broken as a result of seismic activity. There are fireballs erupting from the lava and ivy creeping over walls, damaged walls and ceilings, the works. But the nicest effect that the authors introduced is the darkening (and in one case, reddening) of everything just prior to a big fight. Very much in keeping with the whole anomaly gig.
[EDIT: It has been pointed out to me that Deimos is an irregular shaped asteroid that just happens to orbit Mars as a "moon". Therefore, the object in the night sky is most probably Mars (sans the orange-red tint that it gets from hematite).]
The architecture is competent, and takes a turn towards the gothic. As about half the map is set in a hellish environment, this departure fits right in. There is an abundance of lava, caverns, and red stone, plus an ominous-looking gateway at the end. The lighting sets the mood perfectly, and skylights that reveal the stars round off the feeling very nicely.
Map Design: When I got to this map I was wondering what the Team was going to do with it, seeing as how every preceding map was expanded beyond the originals. The original E1M8 is simply a few extra rooms with easy fights thrown in as a prelude to the final boss battle. Z1M8 is quite different. There are expansive new areas for you to explore, and some very tight quarters in which you will be forced to fight. There are the throwbacks to the original, of course, most notably the start area of E1M8 with the nukage pool and exploding barrels. This time, however, the authors have introduced that area with a twist. [Tip: For best effect, do not blow up the barrels when you first enter the area. Save them for later.] And no remake of Phobos Anomaly can be complete without a pentagon-shaped arena.
Being an E1M8 clone, this map is generally quite linear (although some back-tracking occurs) and there is never any risk of the player being lost. The back-tracking is rewarded (if that's the right word) with additional fights, so the retracing of one's steps is not boring. Once you get to the first (of several, I'd like to point out) arena you can only travel forward, and you can forget about any goodies you may have left behind in the hopes of returning for later.
There are a paltry 3 secrets in this map, none of which contains the sorely-needed Rifle. For the most part the secrets are easy to find for the observant player, but the secret with the soul sphere has only the slightest indentation to declare it out of the ordinary.
Gameplay: One of the most significant aspects of this map has to be its gameplay. The original E1M8 introduced us to arena combat, and Z1M8 carries on that tradition. But I'll get to that in a minute. You're given a shotgun and some shells at the beginning, but if you're starting with a pistol you'll need to be fleet of foot to get past the waiting enemies to the ammo store behind. You'll pick up a chainsaw soon after, and a chaingun after a bit. Unless you find the hidden rocket launcher, you'll be stuck with these three weapons for practically half the map, which makes for some very tedious fights. Fighting a Baron of Hell (or even a Hell's Fury) with a shotgun and chaingun? Been there, done that. Gimme the good stuff, already. Things get interesting once you pick up the double-barrelled shotgun [with a very nice battle right after that], and you'll definitely need that grenade launcher where you're going, buddy. Thankfully you're given the rocket launcher later, but it would have made for less tedium earlier in the map.
There are some nice traps, and some genuine frights (such as when the lights go dark, you hear this hideous bellow, and the first Nightmare appears). But what takes the cake has to be the last three arena battles. The first of these three was exceedingly difficult at first, as I was being assailed by Demon Cubes from all around, Barons from the fore, and shadow imps from above. I tried that fight with every possible weapons combination (minus the Rifle) and failed. [Oh, for a fully stocked plasma rifle at that moment.] In the end I only succeeded when I got the Barons and Demon Cubes in the middle, and circle-strafed them to death. [I don't know how the Demon Cubes simply wandered into the middle, but without it I would have had as much chance as an ice-cream cone in Ecuador.] The battle with the Bruiser Demons was just as frustrating, even with the blur artifact that I had saved. In the end I whipped out the Rifle and let them have it. Even then it took me several tries. Without the Rifle I probably would have resorted to using a cheat code to get past them.
The final battle with the Deimos Guardian was quite entertaining, except that for a long time I could never quite defeat it. I tried circle-strafing around the lava lake (the rock edges "collapsing" into the lava was a nice touch), but fighting off imps and Lost Souls while the Guardian was drilling me in the back with his special brand of hot sauce, made for very short battles indeed. Had there been more health, I would have kept trying this mode of assault. I even used the console to give myself 100 health points a couple of times, to see if it could be done. Finally, I settled on the lame way of defeating it - I ran up to the gate, and combined sniping with crouching to avoid the main attacks. Also, after I had tried the fight a dozen times and ended up a gooey mess on the wall, I resorted to using the Rifle. I believe the fight could have been made far more fun had there been more health (and even possibly periodically spawning health). Defeating an awesome opponent by cowering and sniping did not give me much satisfaction.
There is a decent balance of health, armor, and ammo for the better part of the map. However, the final boss battle with the Deimos Guardian had a complete absence of health. [And no, the measly twin medipaks that were available after fighting off the Bruiser Demons barely count.] If, for some reason (say a bruising battle with powerful enemies just preceding), the player wanders into the final arena low on health then we can all say Hallelujah! It's Christmas time! Because for sure his/her goose is cooked. I fail to see why the authors would not have stocked the area with health and ammo, and in my opinion this is an oversight that can make the difference between a fun conclusion and a frustrating reload of saved games. Additionally, not letting the player have a Rifle simply makes the fight unbalanced in the enemy's favor.
Wow Factor: There are so many Wows, I don't know where to begin. Let's start with the Nightmares - they were the perfect enemy for the darkened corridors of the Phobos Anomaly. Materializing in front of your eyes to scratch and claw before dissolving into thin air made for some very tense and spooky moments. The Demon Cubes were a terrific addition to this map-set, with their wonderful animation and attacks. Facing them as they poured out of the first area and picking them off as they turned the corner was a far cry from dealing with them as they swarmed around me later in the map. Very well done. And for the piece de resistance the Team has served up a healthy portion of dessert in the form of a new boss. And what a boss it is - multiple attacks, periodically disappearing into the lava, spawning Lost Souls. Very nicely crafted behavior. However, the graphics were .... how to put this without offending .... somewhat cartoony. I know that an inordinate amount of work must have gone into it, and I'm in no way denigrating the efforts of the Team; but, despite the excellent artwork, it seemed very 2-dimensional. And that's not counting the fact that the extra set of arms were fixed to point upwards, serving no apparent function. Still, I laud the Team for trying, and the first time I saw the creature I admit I went Wow!
And I would be remiss if I did not point out the excellent way the credits have been presented. Kudos on a job very well done.
[EDIT: Nigel 'Enjay' Rowand pointed out on the ZDooM forums that Z1M8 has a cool 'defensive' feature. There is a switch next to the door leading to the yellow key, and this switch activates a force-field nearby. If you turn this force-field on in time you can destroy, damage, or at least slow down the demon hordes that try to swarm through there. A very neat feature, I must say.]
What stands out in my mind about this map is the intense battles. I still haven't figured out the best way to even the odds against me, but I intend to go back and find out. Meanwhile, if I were to make some changes to this map it would be to provide the Rifle about mid-way into it and to have periodically spawning health when fighting the final boss.